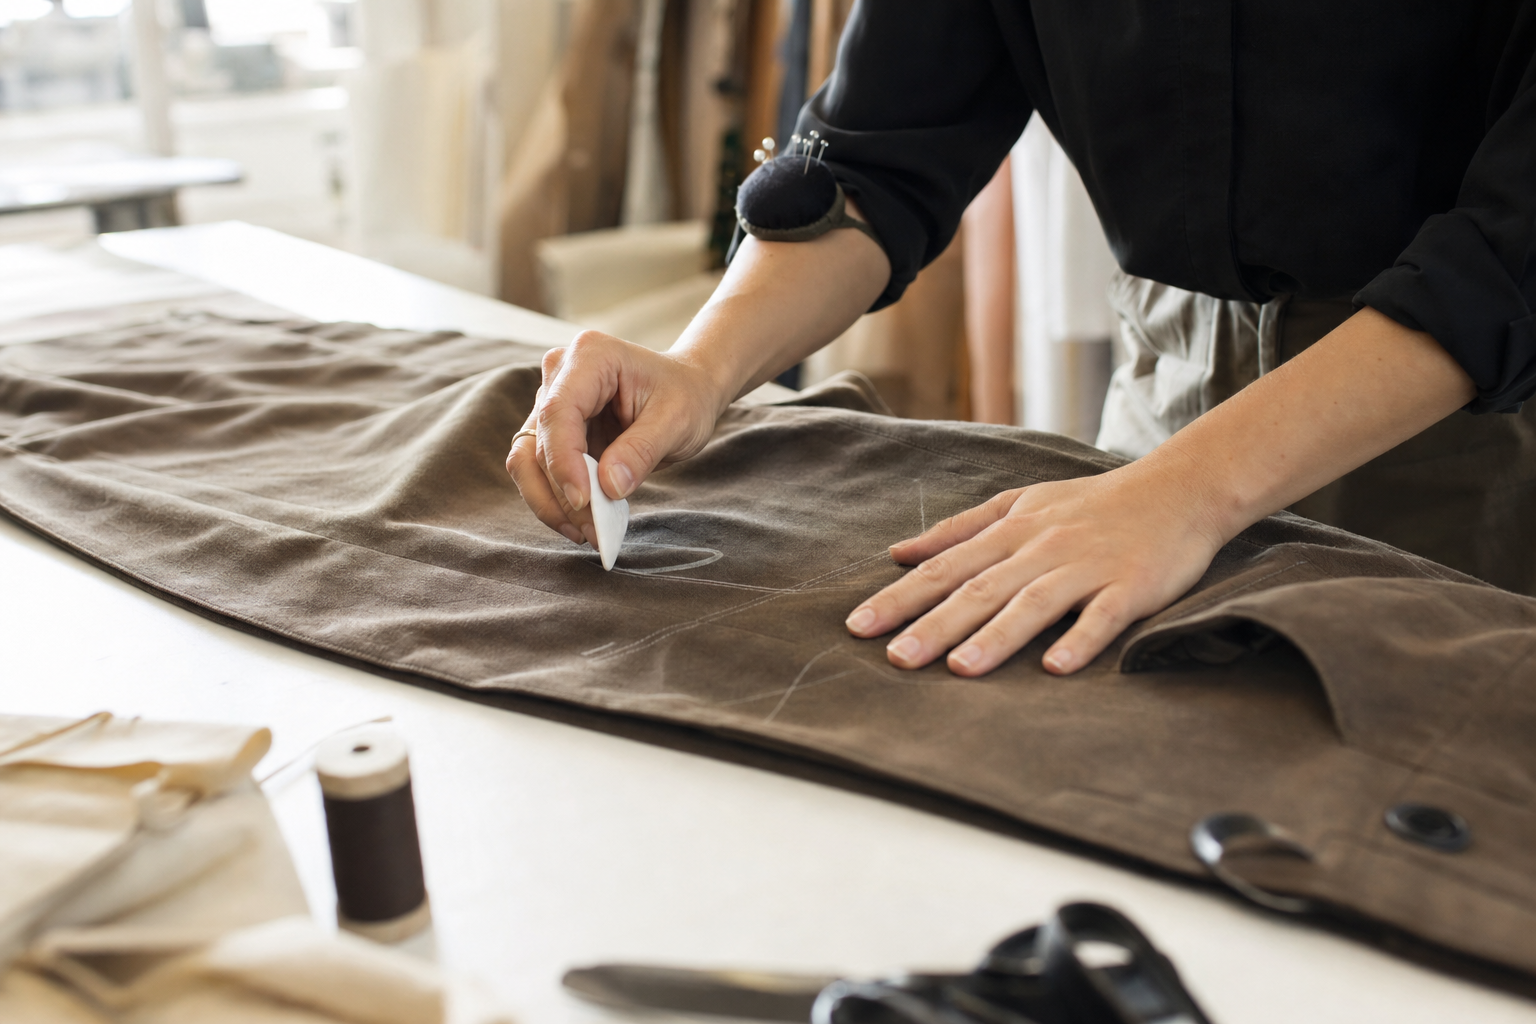
Understanding Pant Anatomy - A Guide for Designers
A buyer at a $20M denim brand opens a return: “waist gaps when I sit.” The CX team flags it. The designer pulls the tech pack. The back rise spec says 14 inches. The factory shipped 13.25. Nobody caught it at PP sample because the measurement was never called out on the grading sheet, only on the front sketch. One missed dimension, 600 units, a 9 percent return rate on that SKU, and a markdown cycle that erases the season’s margin on that style.
This is what pant anatomy actually is in an operating apparel business. It is not a vocabulary lesson. It is the named map your design, production, QC, and customer service teams all read from. When that map is fragmented, returns climb, sample rounds multiply, and grading becomes guesswork. When it is codified, pant programs move from sketch to shipped with predictable fit and fewer rework cycles.
This refreshed guide walks the full anatomy, then connects each component to the production decisions that make or break a pant program.
What is pant anatomy and why does it matter operationally?
Pant anatomy is the documented set of components, seams, and points of measurement that define how a pair of pants is constructed and fit. It covers the waistband, rise, crotch, fly, inseam, outseam, thigh, knee, hem, pockets, belt loops, yoke, seams, and trims. Every one of these is a decision the designer makes, the patternmaker executes, the factory sews, the QC team inspects, and the customer either accepts or returns.
The reason it matters operationally is simple. Every component that is not explicitly specified becomes a default the factory chooses for you. Default rise heights drift by a quarter inch. Default belt loop count varies from five to seven. Default pocket bag depth changes between sample rounds. Each drift is small. Stack them and a slim-fit chino becomes a different garment than the one you approved.
In the go-lives I have run this year, one thing keeps proving true: brands that lose control of pant programs are not losing control of design. They are losing control of the product data that defines the anatomy. That is the first of the 6 Breakpoints of Apparel Operations, where product data starts fragmenting between the designer’s file, the factory’s PP sample sheet, and the QC inspection report.
What are the structural components of a pair of pants?
This is the working anatomy every tech pack should cover. The descriptions below are the version you want in your PLM, not a glossary.
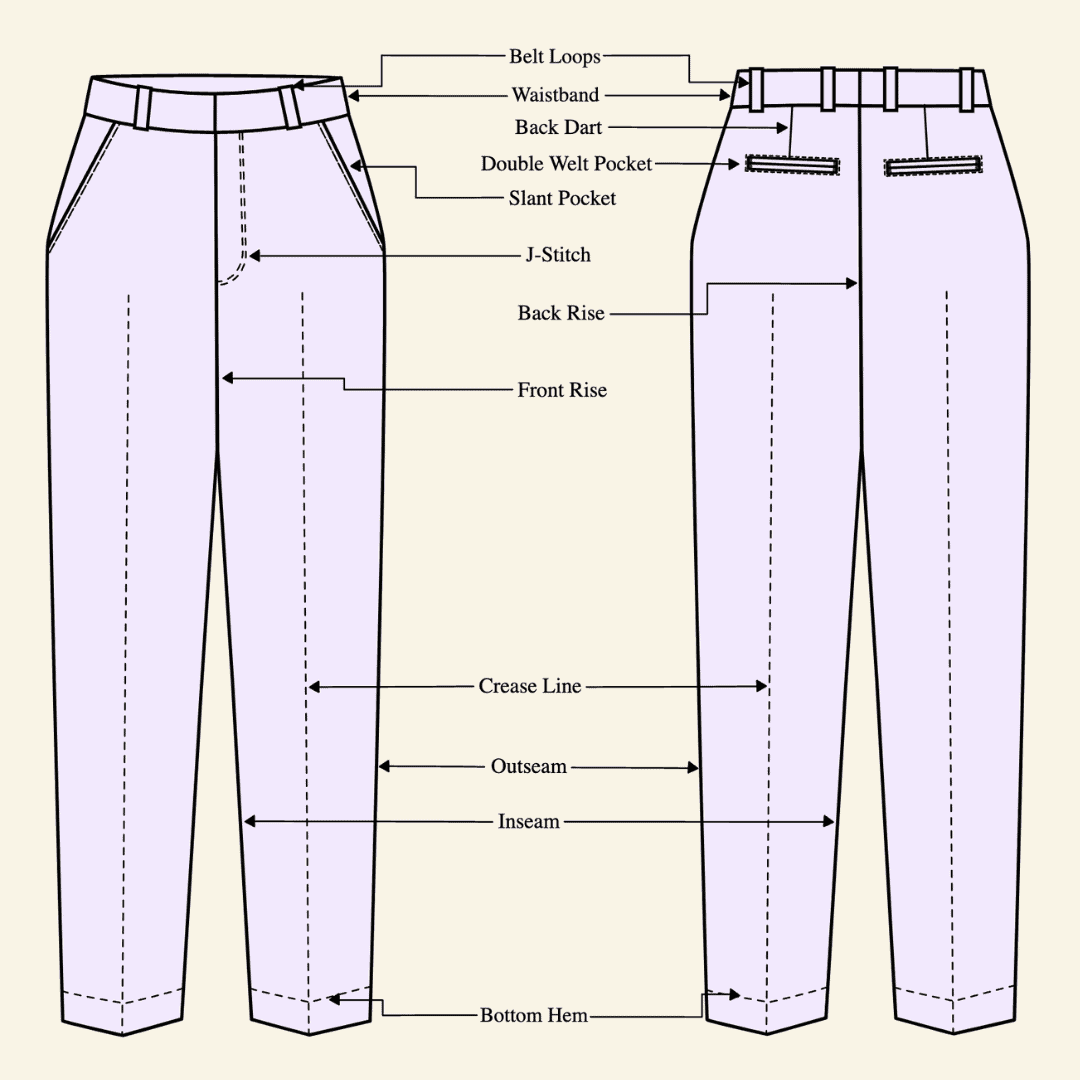
Waistband
The topmost part of the pants that hugs the waist. Waistbands vary from contoured and straight to elasticated or drawstring, and the choice affects both comfort and the grade rule for waist measurement. A contoured waistband grades differently than a straight one because it follows the body’s curve. If your tech pack does not specify which, the factory will pick.
Front and back rise
The rise is the measurement from the crotch seam to the top of the waistband. The front rise affects how high the pants sit in front. The back rise ensures comfort and proper seat fit. High-rise, mid-rise, and low-rise pants are defined by these two numbers, not by marketing language. A 12-inch front rise and a 15-inch back rise is a different pant than a 10-inch front and 13-inch back, even if both are called “mid-rise.”
Crotch (seat)
This is where four seams intersect. It is the single highest-stress point of any pant and the most common failure location in wear testing. A well-engineered crotch curve handles movement and reduces blowouts. Specify the curve, the seam type (flat-felled, overlocked, or bartacked), and the stitch density.
Fly
The fly allows the pants to be put on and removed. It can be a zipper fly, button fly, or a mock fly on pull-on styles. Specify the zipper length, the brand and gauge (YKK 4.5 versus 5), the topstitch placement, and whether the fly shield is single or double layer.
Inseam and outseam
The inseam runs from the crotch to the hem inside the leg. The outseam runs along the outside, from waistband to hem. Together they determine the overall length and silhouette. The inseam is the number on the hangtag. The outseam is the number that determines proportion. Both need to be on the grading sheet.
Thigh, knee, and hem
These three points of measurement shape the leg and define whether the pant reads as slim, straight, tapered, bootcut, or wide-leg. Thigh circumference, knee circumference (measured 14 inches down from the crotch on most brands), and hem opening together create the silhouette. Change one without the others and the leg line breaks.
Which design features turn a generic pant into a branded pant?
The structural anatomy above gets you a pair of pants. The features below are where the brand identity lives, and where most production complexity hides.
Pockets
Pockets come in many forms: slant, patch, welt, cargo, coin, watch, and back patch. Each has a different construction time, a different bag depth specification, and a different trim list. A five-pocket Western jean has roughly 40 percent more sewing operations than a flat-front trouser with two welt back pockets. That difference shows up in the FOB price and the production lead time.
Belt loops
Attached to the waistband, belt loops carry a belt and double as a design element. The standard count is five for jeans, seven for trousers, but the spacing, width, and bartack placement vary. Specify the count, the width to a sixteenth of an inch, and whether the back center loop is single or double.
Yoke
Common in jeans, the yoke is the V-shaped panel on the back that contours the waist to the seat. A deeper yoke gives more shaping. A shallow yoke gives a straighter back. Yoke height belongs on the grading sheet alongside rise.
Seams
Side seams, inseams, rise seams, and yoke seams each have a construction style. Flat-felled seams are stronger and more expensive. Overlocked seams are faster and cheaper. Chainstitch hems give the rope effect on premium denim. Lockstitch hems lie flat. The seam type is a cost driver and a brand signal at the same time.
Labels and tags
Main label, size label, care label, country of origin, and any flag labels on the back pocket or coin pocket. These are often the last thing specified and the first thing that gets wrong on PP samples. Specify the placement to the eighth of an inch and the attach method (sewn-in, heat transfer, or woven loop).
What role do fabric and construction play in fit reliability?
The type of fabric and the stitching technique used drives durability, hand feel, and how the pant behaves after wash. Common materials include denim, cotton twill, wool suiting, and synthetic blends. Each behaves differently on the cutting table and each shrinks at a different rate.
The operational point is this: fabric choice locks in your shrinkage allowance, your wash recipe, and your grading tolerance. A 100 percent cotton denim with no stretch will shrink 6 to 8 percent in length after a one-wash finish. A cotton-elastane blend will shrink 3 to 4 percent and recover differently across the grade. If your tech pack does not include the post-wash measurement chart, you are inspecting a different garment than the one the customer receives.
Stitch quality is the second variable. SPI (stitches per inch) on the inseam should be 8 to 10 for denim, 10 to 12 for trousers. Bartack count at stress points (pocket corners, fly base, belt loops) is a QC checkpoint, not a designer decision. Document it once, inspect it every PP and every TOP.
How do you keep pant programs from drifting between sample rounds?
This is where most brands lose time and money. The first sample looks close. The second sample is off in two measurements. The third sample fixes those but introduces a new one. By PP4 you are out of calendar and you ship anyway.
The fix is not better samples. The fix is treating pant anatomy as governed product data. The anatomy lives in one place, every revision is logged with a date and a reason, and every PP sample is inspected against the current revision, not against memory. This is the PLM and PIM layer of the operations stack, and it is where the 6 Breakpoints framework names the second failure: production and supply execution drifting away from what was planned.
Uphance handles this by tying the tech pack to the production order so the factory always sees the current spec, and any deviation on the PP report flags against the live measurement chart instead of a PDF that was emailed three weeks ago.
What are seven ways to tighten pant design and production?
1. Standardize your block patterns
Keep a governed library of block patterns for each core fit: slim, straight, relaxed, wide-leg, tapered. New styles start as variations on a block, not as a fresh draft. This cuts patternmaking time by 30 to 50 percent on follow-on styles and keeps grading rules consistent across the line.
2. Use digital design tools
CAD software and 3D garment simulation platforms like CLO and Browzwear let you visualize and adjust designs before cutting a physical sample. This cuts prototyping time and material waste, and it surfaces fit issues at the avatar stage instead of at the fit session.
3. Prioritize fit consistency
Develop a reliable sizing chart and hold the line on it. Grading becomes mechanical and customer satisfaction climbs. Fit issues drive 60 to 70 percent of apparel returns in DTC. Every tenth of a percent improvement on return rate is real margin on a $20M brand.
4. Limit excessive style variations
Focus on a handful of core silhouettes each season. Too many variations slow production, fragment buyer attention, and dilute the line. A tight assortment sells better than a sprawling one.
5. Choose versatile fabrics
Pick materials that source cleanly, sew well across multiple pant styles, and share wash recipes. Versatile fabrics reduce SKU count at the raw material level, which cuts purchase order complexity and minimum order quantity exposure.
6. Tighten pocket and trim options
Instead of five pocket styles and ten trims, narrow to the best performers. Standardized trims reduce sourcing complexity, lower the number of POs your production team manages, and tighten brand cohesion across the line.
7. Get feedback early
Involve your production team, fit models, and key wholesale buyers in the design review. Early feedback catches problems while they are still cheap to fix. A fit issue caught at proto-1 costs a sample. The same issue caught at TOP costs a production run.
A quarter inch of drift is a margin problem
Pant anatomy is not a design topic. It is an operations topic dressed up as a design topic. Every component on the anatomy map is a data point that needs to live in your PLM, propagate to your production order, get inspected on your PP and TOP reports, and feed your QC and customer service teams when a return comes back.
The brands that run pant programs cleanly do three things. They treat the tech pack as a living document tied to a version number, not a PDF sitting in a shared folder. They grade against measured post-wash specs, not raw cut specs. They close the loop from return reason codes back to the spec library so the next season’s block reflects what actually happened in the field.
The brands that struggle treat pant anatomy as designer knowledge. The designer leaves, the knowledge leaves, and the next season’s program drifts by a quarter inch in three places. That drift is the difference between a 4 percent return rate and a 12 percent return rate. On a $20M denim brand, that is roughly $1.6M in gross merchandise value that bounces back through the warehouse, which then needs to be processed, inspected, and either restocked or marked down.
This is why pant anatomy belongs in the operations conversation. It is product data. It governs production execution. It feeds inventory accuracy when returns flow back. It shows up in reporting when you slice return rates by style and by fit. Four of the 6 Breakpoints (product data, production, inventory, reporting) all touch this one topic.
Get the anatomy documented, governed, and connected to the rest of the stack, and pant programs become predictable. Leave it as tribal knowledge in a designer’s head, and every season is a new round of fit firefighting.
Frequently asked questions
Where this fits in the Uphance platform
Ruchit writes about product strategy for apparel operations, covering how mid-market fashion brands use connected workflows to manage product development, inventory, orders, warehouse execution, and reporting. As Head of Product at Uphance, he shapes the roadmap that ties PLM, PIM, BOM management, allocation, fulfillment, and warehouse operations into one system. His articles dig into apparel-specific operational mechanics: tech packs, spec sheets, putaway, pick-pack, landed cost, and the data plumbing that makes inventory truth possible across multiple channels and locations. He focuses on the workflow-level questions that separate generic ERPs from systems built for how apparel brands actually run.
Ronnell writes about onboarding, adoption, and operational readiness for apparel brands moving to a connected platform. His articles focus on what it takes to go live with confidence and sustain strong execution across channels, warehouses, and teams. As Head of Customer Success and Onboarding at Uphance, he leads the implementation phases that turn a software signature into running operations. He writes about kickoff scoping, data migration, sandbox cutover, change management patterns, and the stakeholder alignment work that determines whether a connected platform actually changes how a brand runs, or just adds another login to the existing chaos.